

Why You Should Hire A Certified Chimney Sweep
Your chimney is an important part of your home, which means it should be treated as such. Regular maintenance and care is imperative to ensure that your chimney is in safe and good working order every time you need it.
Before we get into who you should hire to clean your chimney, let’s first take a look at why you should hire one in the first place.
Why should I hire a chimney sweep?
When you hire a chimney sweep, they do much more than just clean the flue. They are addressing issues that could save your home from potential disaster. Here are a few concerns chimney sweeps will address:
- Is your chimney vulnerable to chimney fires because of creosote buildup?
- Does your home have the best possible heating and cooling efficiency?
- Could your family be exposed to deadly carbon monoxide poisoning?
- Does your firebox need to be replaced?
- Are you contributing to the pollution problem when using your fireplace?
Why you should hire a certified chimney sweep
By not hiring a chimney sweep—or hiring one who's not certified—you could be putting your family and your home at risk.
To be part of the Chimney Safety Institute of America (CSIA), chimney sweeps go through rigorous training. These certified chimney sweeps are continually sharpening their skills and learning about following chimney safety techniques practiced by the CSIA.
One of the benefits of hiring a chimney sweep who is certified is that you can have full confidence in the person you’re bringing into your home. With a CSIA certified company, you are guaranteed to receive the most current and qualified chimney care.
Working with a certified chimney sweep company annually ensures that you are keeping your family and home as safe as possible. Ready to hire a CSIA chimney sweep? Give B+E a call. All of our chimney sweeps have received their certifications and are guaranteed to take good care of your chimney.


Realtors: Do You Have These Issues? We Can Help!
As a realtor, you are asked to list a variety of homes—those in good condition and those that need a little love. You regularly encounter houses in need of chimney sweeps, tuck pointing, brick repair, and fireplace overhauls. Some of the work is obvious, while others might be more difficult to notice. If you have any of the issues below with your homes on the market, let us know. Brick + Ember Outfitters can help!
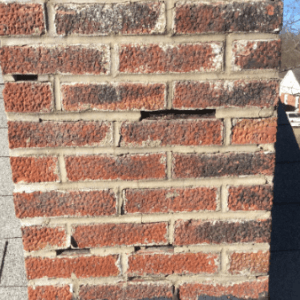
The gaps in this chimney mean that it needs tuckpointing. (If you don’t know, that’s when mortar joints are damaged.)
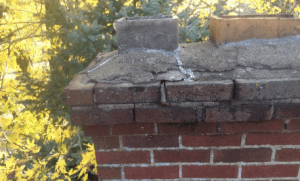
This crown desperately needs a replacement. (We also do crown repairs!)
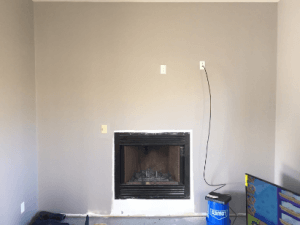
This fireplace was so ugly that we ripped it out. We’re your go-to for fireplace installations, fireplace repairs, and fireplace replacements!
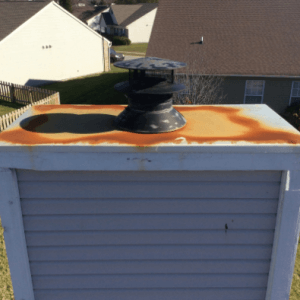
This chase cover is clearly rusted, and it needs a new one—preferably one with a lifetime warranty like we offer!
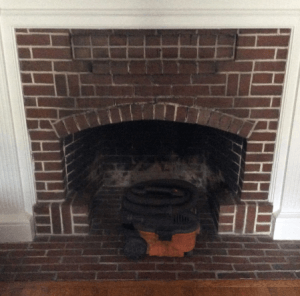
To a potential homebuyer, this chimney looks like work. Hire us to do a chimney sweep and chimney inspection to put their minds at ease!
If you see any of these problems in the homes you’re listing, give Brick + Ember Outfitters a call. We work on your timeframe, and we’re pre-emptive about issues, which saves you money in the end. Let us resolve these issues for you before they become more significant than they already are.
Brick Patio Repair: A How-To Guide
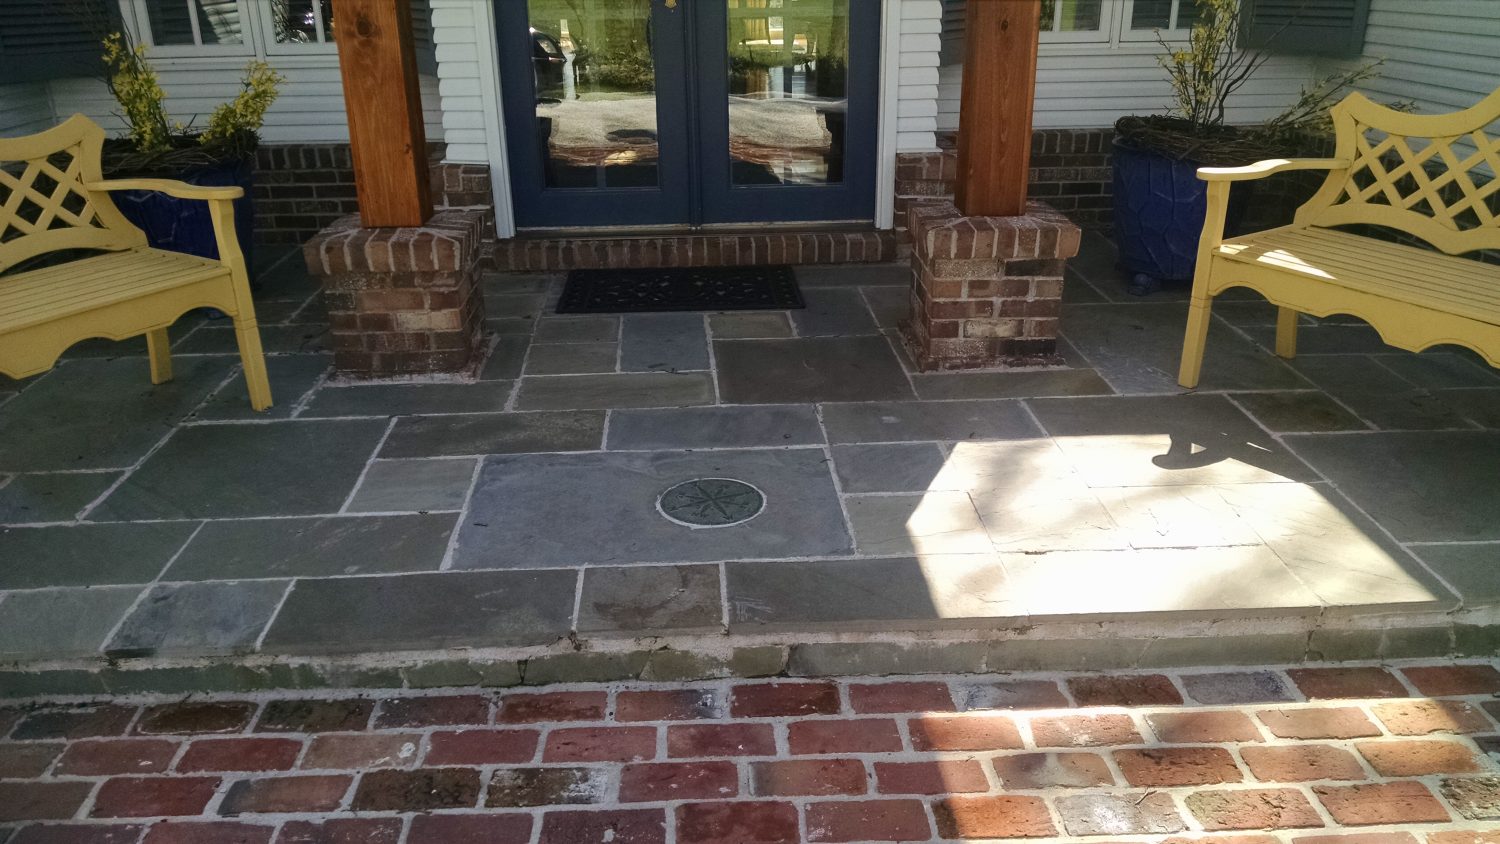
If you live in Indiana, chances are you’ve experienced cracked or broken patio stones because of our frigid winters. Bricks crack due to freezing and thawing, allowing water to cause damage. To be fair, bricks can also break due to poor installation or material issues.
Regardless as to how the damage happened, the stones need to be relaid. Not only will it look better, it’s also be safer for you and your family.
Here’s how you can replace a broken brick or patio paver.
- Use a crowbar to remove the broken stone. If it’s in concrete, you may need to break it first with a hammer and chisel. If you attempt this, make sure you wear protective eyewear and gloves.
- If there is old mortar present, chip it away. Also remove any debris from the stone bed.
- Next, put down new mortar and level it with a trowel.
- Place the new brick or paver in place. Make sure you double-check that it is level with the existing bricks.
- Use a mallet to tap the stone in place.
- Use mortar (or a dry mix) to repoint the stone.
If you have questions about how to fix your bricks or patio pavers, give Brick + Ember Outfitters a call. We love to do this type of project!
How to Install Vinyl Siding Over Brick
If you are a homeowner in Central Indiana and you want to update to the exterior of your brick home, then you might think that your only option is to rebrick your entire house. (If this is something you would like help with, Brick + Ember Outfitters would obviously be happy to be of assistance.)
But what if you had your heart set on beautiful blue vinyl siding? Thankfully for you, you don’t have to rip out all of your current masonry work because—contrary to popular belief—it IS possible to install vinyl siding over brick exterior.
Admittedly, putting vinyl siding over brick can be a challenge since it can’t be directly fastened to the walls; however, it can be done with the help of furring strips. If you’re not familiar with them, furring strips are lengths of wood used in roofing and construction.
Here’s what you need:
- Masonry nails or screws
- Carpenters level or plumb bob
- Hammer
- Weatherproof nails
- 1x2 inch wood furring strips
- Power drill with masonry bit
- Insulation (optional)
Marking the brick
Mark on your brick wall where you need to attach each vertical furring strip. It is imperative that the furring strips are straight. So as you mark the locations, use a plumb bob or carpenters level to achieve this. You’ll want to install a strip at every panel joint. (Make sure your marks will be easily seen above and below when you go to attach your panels.)
Attaching furring strips
Next, you’ll want to drill guide holes through the furring strips into the brick on your vertical lines. Place masonry screws or nails as fasteners into the guide holes.
Installing insulation and siding panels
If panel insulation is something that you want to utilize, that should be installed before your panels. Once that is done, use a hammer and nails to attach your panels to the strips. (Don’t forget to use weatherproof nails!)
Here at B+E, we’re not experts when it comes to vinyl siding, but we ARE experts when it comes to bricks. If you have any questions regarding your masonry, don’t hesitate to reach out.
What Goes Into the Cost of Tuckpointing?
Chances are, if you live in a 10+ year old home in Central Indiana, then you probably have damage to your mortar structure, whether you know it or not.
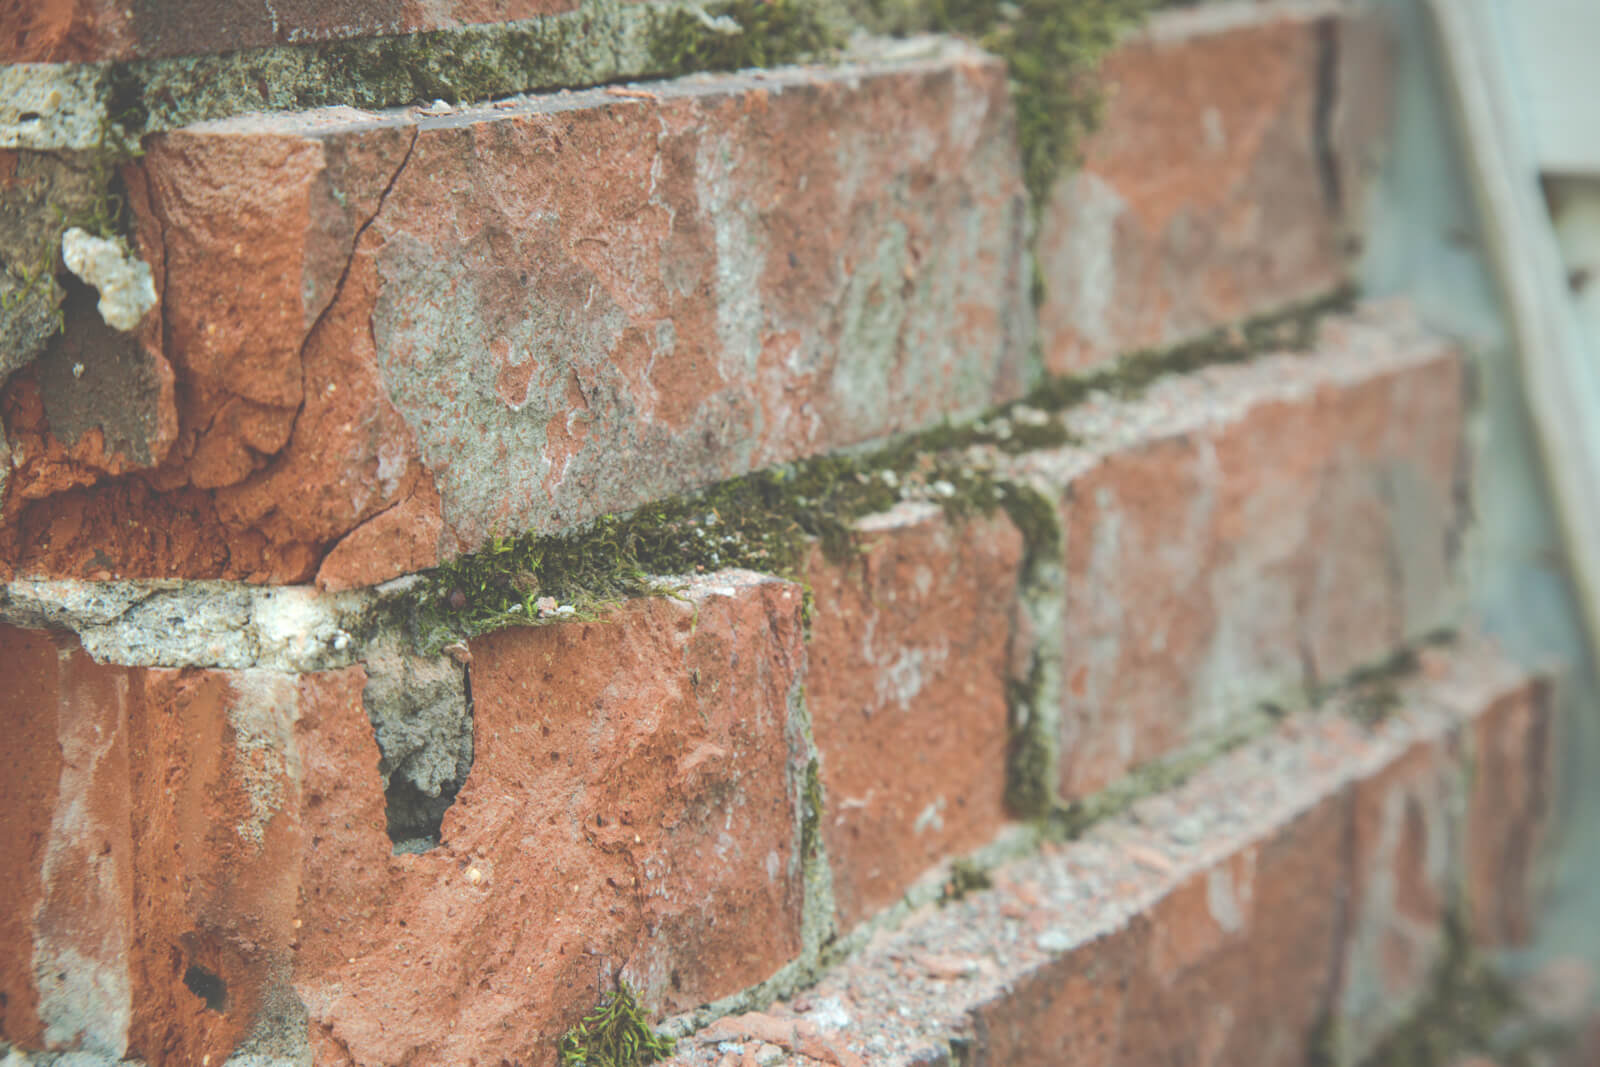
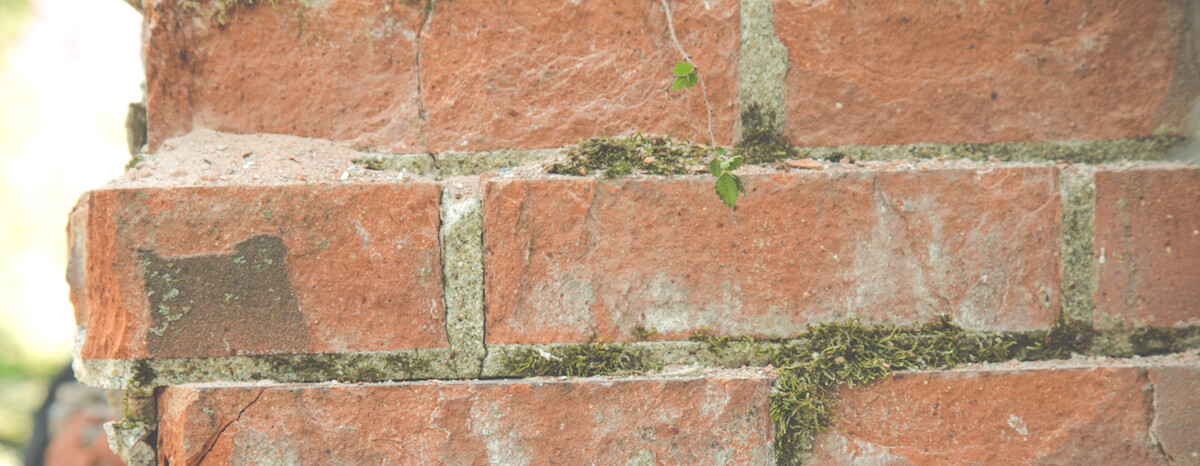
Cracks, voids, and crumbling mortar are all common because of prolonged exposure to the elements. If compromised mortar is not dealt with, it can cause more deterioration to your home, which can prove to be costly.
So, what are you to do when your patio, foundation, chimney, brick wall, or masonry structure has been damaged? Perhaps the best—and most cost-effective—solution is tuck pointing. Because most people are not familiar with this term, let’s first take a look at what tuck pointing is.
What is tuck pointing?
Tuck pointing is the process of removing damaged mortar between brick or stone and reapplying it so that it matches the existing structure. Here at B+E, we want to maintain a seamless transition visually between the old and new work, so we work hard to create a natural look.
What should be considered in cost?
Tuck pointing requires attention to detail, and it can be time-consuming work, so it’s best to hire an experienced professional. Several criteria go into the cost of tuck pointing. The condition of existing joints, accessibility, and quantity can all play a role in the final price tag.
Some masonry companies will charge you by the square foot for your tuck pointing. Here at B+E, we know that every project we work on is different, so all angles should be considered. When we come out to give you an assessment, we’ll give you an itemized quote that includes installation.
If you need repairs—tuck pointing or otherwise—to your masonry structure, give Brick + Ember Outfitters a call. Our Outfitters can handle any job, big or small.
Front Porch Brick Repair: What You Need to Know
Your front porch is the entryway into your home, so naturally you want it to be inviting. But if you have structural damage to your front porch, it’s going to be an eyesore. If you live in the Midwest, then most likely you battle have cracks, mortar crumbling, or missing bricks due to Mother Nature’s freezing and thawing.
Don’t you think it’s time to fix the damage? Here’s what you need to know when it comes to repairing the bricks on your front porch.
Removing brick
If you want to try to repair your front porch on your own, you need to start by removing the loose brick. Depending on the condition, you may not need any more than a pry bar.
Structural compromise
Oftentimes, the damage that you see is just the tip of the iceberg. So it’s important to check and see if your underlying issue may extend to the structure, like a support wall or cement block. If so, we recommend you bring in the masonry experts. (Even if you don’t have structural damage, we’re still happy to help.)
If your front porch damage hasn’t compromised your structure, continue removing the loose bricks. As you go, we recommend cleaning off the old mortar and stacking the bricks off to one side for later use.
Preventative work
One thing you need to keep in mind as you work on your front porch is that repaired brickwork can suck up moisture from the ground. To combat this, we suggest digging a 2-foot deep trench and filling it with crushed stone.
You also want to make sure that you have a solid connection to your support wall. Every few feet, nail a metal brick tie to the wall.
At this point, you’re ready to reinstall your old brick. Start at the ledge in the support wall. When you get to a tie, just bend up the end and rest the brick on the top. Cover it with mortar, and you’re good to go.
If you have any questions or need help with your front porch brick repair, call B+E. We’ll be happy to come out and assess your damage with a free quote.
How Chimney Inspections Can Save Realtors Time and Money
The Indianapolis housing market is hot right now. Realtors all over the city—from Brownsburg to Geist to Zionsville—are in full swing showing homes to prospective buyers while simultaneously putting new homes on the market.
Brick + Ember Outfitters understands that you, as realtors, are busy, which is why we want to help make your life easier. One way we do that is by performing chimney inspections on houses before you put them on the market. Our inspections are all-encompassing—not only can we do a chimney sweep, we’ll check for functionality on all masonry structures of your home, including brick deterioration on your patio and sides of houses. In the end, this small act can save you time and money.Read more
How to Repair Brick Foundations
If you are a homeowner in Fishers—or a business owner in Indianapolis—with a brick foundation, then at some point or another, you’re probably going to need a repair. Cracks are common in this area, largely due to the freezing and thawing of our winters. Not only are cracks ugly to look at, they devalue your home and could potentially cause damage. Allowing water to get behind bricks can cause major issues.
You might be wondering why your brick foundation has damage. Most likely, the culprit of that is cracked mortar. Over time, mortar is prone to deteriorate. Assuming the damage is minor, you could potentially tackle it on your own as a Do-It-Yourself project.
In order to prevent your cracked mortar from causing more damage, you can tuck-point the brick. This means that you remove and replace the existing mortar. If there is extensive damage, we recommend that you leave it to the professionals.
But if you think the damage is minor enough to tackle on your own, here’s how you can take care of it.
- Chisel away the damaged mortar with a hammer. Brush away all of the excess dust and chips when you’re finished.
- Get your mortar ready (mix your own or purchase premixed) and allow it to sit approximately 5 minutes. Add enough water that it makes a paste similar to the consistency of oatmeal. Remember: drier is better than wetter when it comes to application.
- Put water on the joints. This will help remove any remnants, and it keeps the existing mortar from sucking all of the moisture from the new. If you don’t add water, mortar can be difficult to apply and is more likely to crack.
- Use a pointing trowel to apply the mortar in the joints. Remove excess with a brick jointer, which can help make a smooth finish. We recommend starting with the vertical joints first, then moving on to the horizontal ones.
- A few weeks after you have applied the mortar, add some silicone masonry sealer or high-quality acrylic. Doing so will seal the surface, which will prevent further water damage.
If you have any questions or difficulty fixing your brick foundation, give Brick + Ember Outfitters a call. We would be happy to come out and give you a free estimate. Doing so could prevent more damage and save you thousands of dollars!
Bricks 101
Bricks have been around for ages. Over the years, they have been used for a variety of things. Years ago, brick was once used to pave roads. Nowadays, it’s used more for decoration. These man-made stones are used for everything from creating paths in backyards to forming a fireplace in a family room to being beautiful to look at on the exterior of a home.
Because of their uniformity, bricks are ideal to lay flat and bond together with cement, which increases its strength. Most bricks are made to be 8 inches by 4 inches. Despite their common size, there are many different types of bricks to choose from when it comes to masonry.
If you are in the market for some bricks for your home improvement project, it’s important that you know the difference between them.
Common Burnt Clay Bricks
This type of brick is made by being pressed into molds and fired in a kiln. They are used more for function than aesthetics. When used, they require rendering or plastering.
Sand Lime Bricks
Sand Lime Bricks are created with a mixture of sand, fly ash, and lime (hence the name). They are formed with a chemical process called wet mixing. Then it is pressed together with pressure, forming the traditional brick shape. These type of bricks are usually grey as opposed to red. They also have a smoother finish that doesn’t need plastering, and they are incredibly strong, allowing them to be a load-bearing member.
Engineering Bricks
This brick is created using very high temperatures. The result is a dense, strong brick that is able to withstand water absorption. Engineering bricks are great to use for load bearing because of their strength, moisture-resistance, and ability to withstand chemicals.
Concrete Bricks
These bricks are made of solid concrete. They create a great aesthetic appearance, so they are commonly used in fences and facades. Concrete bricks can be made in a variety of colors, as pigments are used during production.
Fly Ash Clay Bricks
Fly Ash and clay are the ingredients for this type of brick. They are made at 1,000 degrees celsius. When they are exposed to water and moisture, they tend to expand, which is something that needs to be taken into consideration before use.
Whatever type of brick you choose, you will enjoy its high compressive strength, porosity, sound insulation, and fire protection. Not sure which type of brick you should pick for your next project? Give us a shout. We’ll be happy to give you our expert opinions.
Brick and Stone: How Do They Differ?
If you are in the market for a new home in Westfield—of if you’re interested in giving your home a facelift in Broad Ripple—you might be trying to decide if you would like to use stone or brick. Similarly, if you are wanting to redo your fireplace in Lawrence or wanting to add a retaining wall in Plainfield, you are probably looking into all of your stone options.
For many, the choice between brick and natural stone comes down to budget. In general, natural stones will be more expensive than brick, largely because their weight is taken into consideration when they’re sold (as opposed to brick, which is sold per unit). You also might be taking into account if you are wanting to install them yourself—or if you plan to hire someone to do it for you.
Natural Stone
Part of the beauty of natural stone is its variation in shape and color. Whereas bricks are uniform, natural stones are more reflective of the variety found in nature, which ranges from dark shades of gray to tan to silver and white. Living close to a quarry is advantageous if you’re choosing to work with natural stone because you can handpick what you want—and you avoid the cost of shipping.
Largely, installing natural stone is going to be a more laborsome process than brick because each stone has its own unique shape and size. With such a large variety, it takes more time to match stones and install them. Installation can also be tricky in that you need to ensure that you have a solid foundation of bricks that can support the rocks above and/or that you can keep them in place until cement dries. Despite the more difficult installation process, natural stone is beautiful and worth the effort.
Bricks
Bricks, on the other hand, are similar in shape, color, and size. That being said, you have lots of choices of color—from deep reds to pale oranges to neutral browns. Because of their uniformity, bricks are easier to install than natural stone. Similarly, it’s easier to calculate just how many you will need to cover on your home’s exterior or on your fireplace.
Like natural stone, bricks are installed using cement, which can require some experience to work with. Because brick is not natural (i.e. it’s man made), it’s much more common than natural stone. So if you are wanting a unique look, that’s something you’ll want to consider.
Regardless of whether you choose natural stone or brick, you’ll want to make sure you have someone install it who has experience. If you are in the market for a new chimney, fireplace, patio or wall outside your home, give B+E a call. We love working with clients on this stuff!